ClearSee™

ClearSee™ is clearing reagent for the plant, possible to make transparent the entire plants in 3 steps (1. fixed 2. washing 3. transparency). Using this reagent enables fluorescence observation up to inside of sample without cutting by removing the chlorophyll.
Use of ClearSee™ allows for transparency while holding fluorescence of fluorescence proteins. Also, the transparent sample can be stored for a long time.
Data provided by Daisuke Kurihara and Yoko Mizuta from Graduate School of Science, Nagoya University, Nagoya, Japan
Features
- Easy-to-use - only 3 steps (1. fixed 2. wash 3. transparency)
- Convenient - Fluorescent dyes and fluorescent proteins can be observed
- Stable - Treated samples can be stored for more than one year at room temperature
Sample
Plant
Time required for transparency
Root: 1-2 days, Leaf/Seedlings: 4-7 days, Pistil: 2 weeks, Mature organization: 4 weeks
*These are criterion. Time required for transparency is different each plants/tissue.
Required materials
■Reagents
- ClearSee™
- Ultra pure water
- Paraformaldehyde (Code No. 160-16061)
- 2mol/L Sodium Hydroxide Solution (Code No. 194-05631)
- 10×PBS (Code No. 163-25265)
- 1×PBS (Code No. 164-25511)
■Equipment
- Autoclave
- Draft chamber
- Vacuum pump
- Desiccator
- Incubator for 60℃
- Conical tube
- Micro tube
- Parafilm
- Needle
- Forceps
- Cover glass
- Slide glass
- Vaseline
Protocol
Example of clearing protocol for arabidopsis leaves and seedlings.
(Please read the package insert for detail.)
1. Fixed
a. Fix the sample with fixative solutions. Because, the samples are floated, soak the samples into fixative solution as possible.
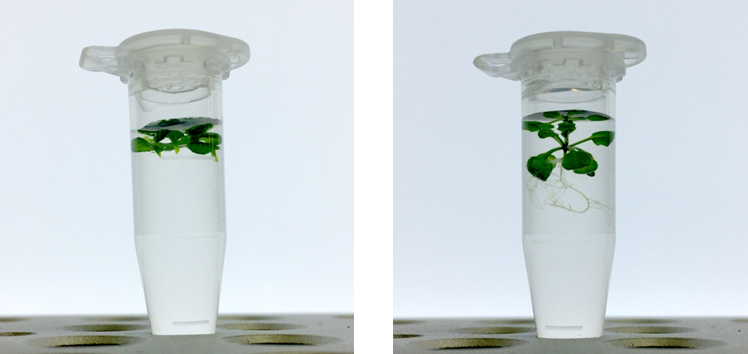
Fig.1 Arabidopsis leaves and seedling in fixative solution
b. Put the samples in the desiccator and turn on the vacuum pump. After closing a desiccator and turn off the vacuum pump, fix for 30 minutes at room temperature.
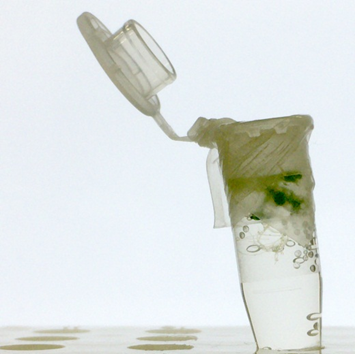
Fig.2 Bubbles from the samples in a microtube
c. After closing a desiccator and turn off the vacuum pump, fix for 30 minutes at room temperature.
d. Repeat steps a and b.
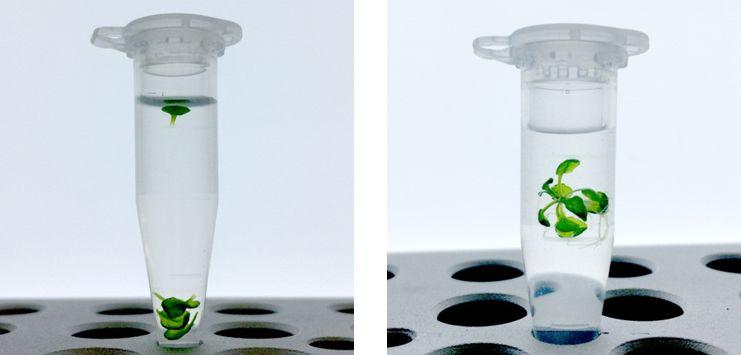
Fig.3 Arabidopsis leaves and seedling after fixative treatment
2. Wash
a. After removing the fixative solution, add 1 x PBS and store for 1 minute (in the draft chamber).
b. After removing 1 x PBS, add new 1 x PBS and store for 1 minute.
c. Repeat steps a and b.
3. Transparency
a. After removing 1 x PBS, add ClearSee™.
b. Put the samples in the desiccator and turn on the vacuum pump.
c. After closing a desiccator and turn off the vacuum pump, store for 1 hour at room temperature.
d. Slowly open the desiccator. After removing the parafilm and close the microtube, store at room temperature in the dark for clearing.
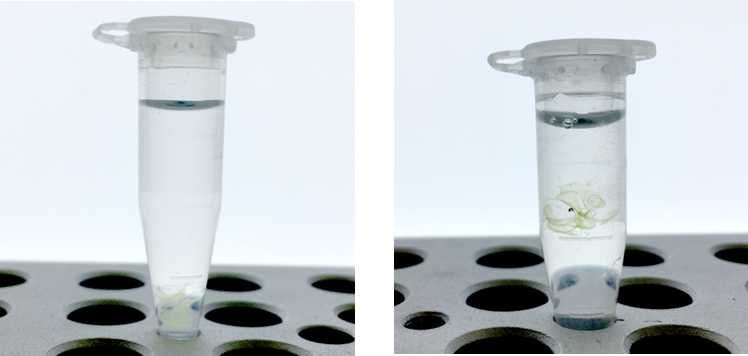
Fig. 4 Cleared Arabidopsis leaves and seedling (3~5 days incubation)
4. Observation
a. Put Vaseline on a glass slide, and transfer the ClearSee™.
b. Treated samples into ClearSee™ on a glass slide.
c. Observe the samples under a fluorescent microscope.
*ClearSee™-treated samples can be stained with florescent stain. As shown below, add a dye such as DAPI to ClearSee™ and let it store for 1 hour. And, replace it with new ClearSee™ and let it stand for 1 hour, observe it under a fluorescence microscope.
(When Stain the nuclear) Add dye to ClearSee™ to a final concentration of 10 mg/mL.
(When Stain the cell wall) Add dye to ClearSee™ to a final concentration of 1 mg/mL.
Application data
▶Fluorescent observation of arabidopsis leaves and seedlings
▶Image of ClearSee™ for multi-color imaging of the whole pistil
▶Image of ClearSee™-treated samples
Fluorescent observation of arabidopsis leaves and seedlings
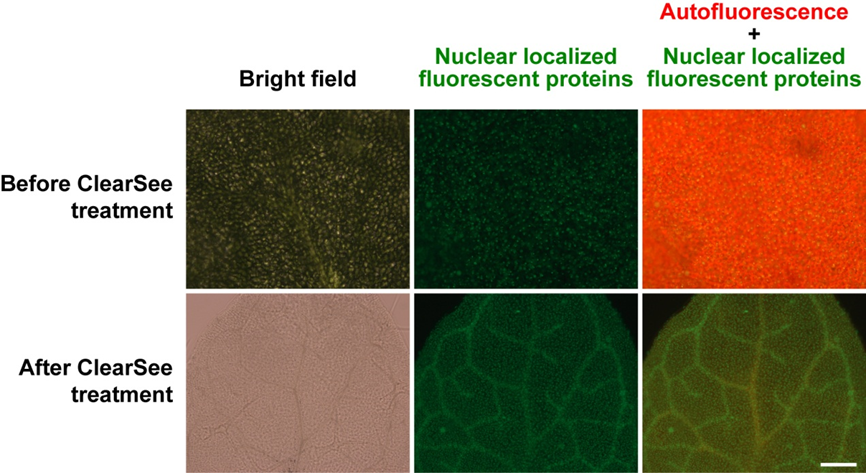
Scale bar: 200μm
Fig. 5 Transparent Arabidopsis leaves
ClearSee™-treated samples are cleared under a bright field. Autofluorescence of chlorophyll is diminished. The fluorescent proteins are detected even in the vascular bundles.
Before ClearSee™-treated
After ClearSee™-treated
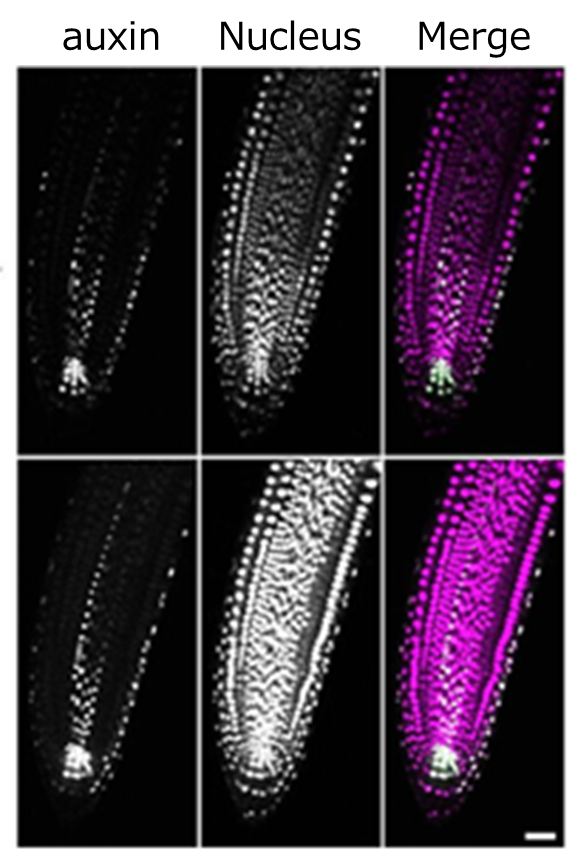
Fig. 6 Root was treated with/without ClearSee™ for 4 days
The nuclei of auxin-responsive cells are shown in green, and the nuclei of whole body are shown in purple. Reprinted with modifications from references.
Image of ClearSee™ for multi-color imaging of the whole pistil
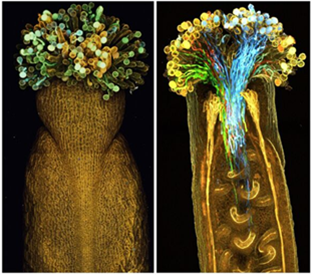
Left: Before ClearSee™-treated
Right: After ClearSee™-treated
Fig.7 Transparent whole pistil
The pollen tubes are marked with four colors (blue, green, yellow, red) of fluorescent proteins. Reprinted with modifications from references.
Image of ClearSee™-treated samples
ClearSee™ could apply to various plant species other than Arabidopsis. Fig. 11 shows ClearSee™-treated leaves of torenia, petunia, tobacco, tomato, cucumber, and rice after 6-days incubation. In the case of rice, the removal of cuticular wax is required for penetration of the solution. Immerse the rice samples into organic solvents such as chloroform for 10~30 seconds and then fix them with a fixative solution.
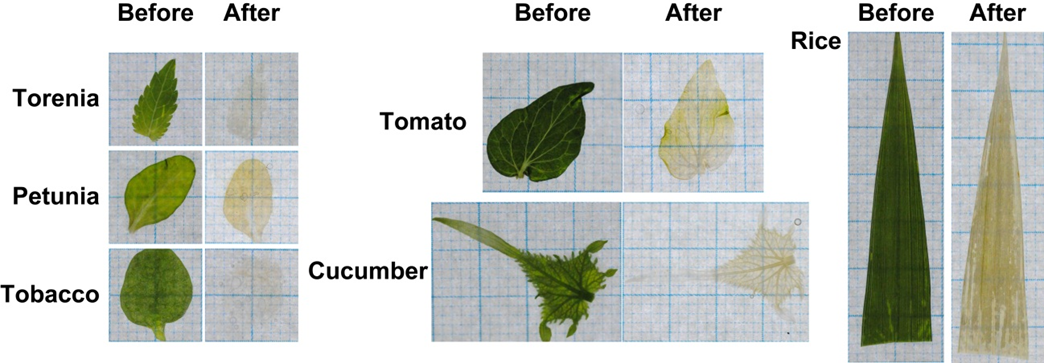
Fig.8 ClearSee™-treated leaves of various plant species (6-days incubation)
References
1) Kurihara, D.et al. : Development, 142, 4168-4179(2015).
2) Nagaki, K.et al. : Scientific Reports, 7, 42203(2017).
3) Ohtsu, M.et al. : Protoplasma(2017).
4) Kalmbach, L.et al. : Nature plants, 3,17058(2017).
Product List
- Open All
- Close All
For research use or further manufacturing use only. Not for use in diagnostic procedures.
Product content may differ from the actual image due to minor specification changes etc.
If the revision of product standards and packaging standards has been made, there is a case where the actual product specifications and images are different.